What is a footer?
It’s possible that your website has a footer. This is an additional section at the bottom of your website that appears on every page. It can contain additional information about your business, such as address details and opening hours.
Using widgets in your footer allows you to adjust it all at once, eliminating the need to go through every page to change your footer.
An example of the footer can be seen in the picture next to this text.
Modify Existing Footer Widgets
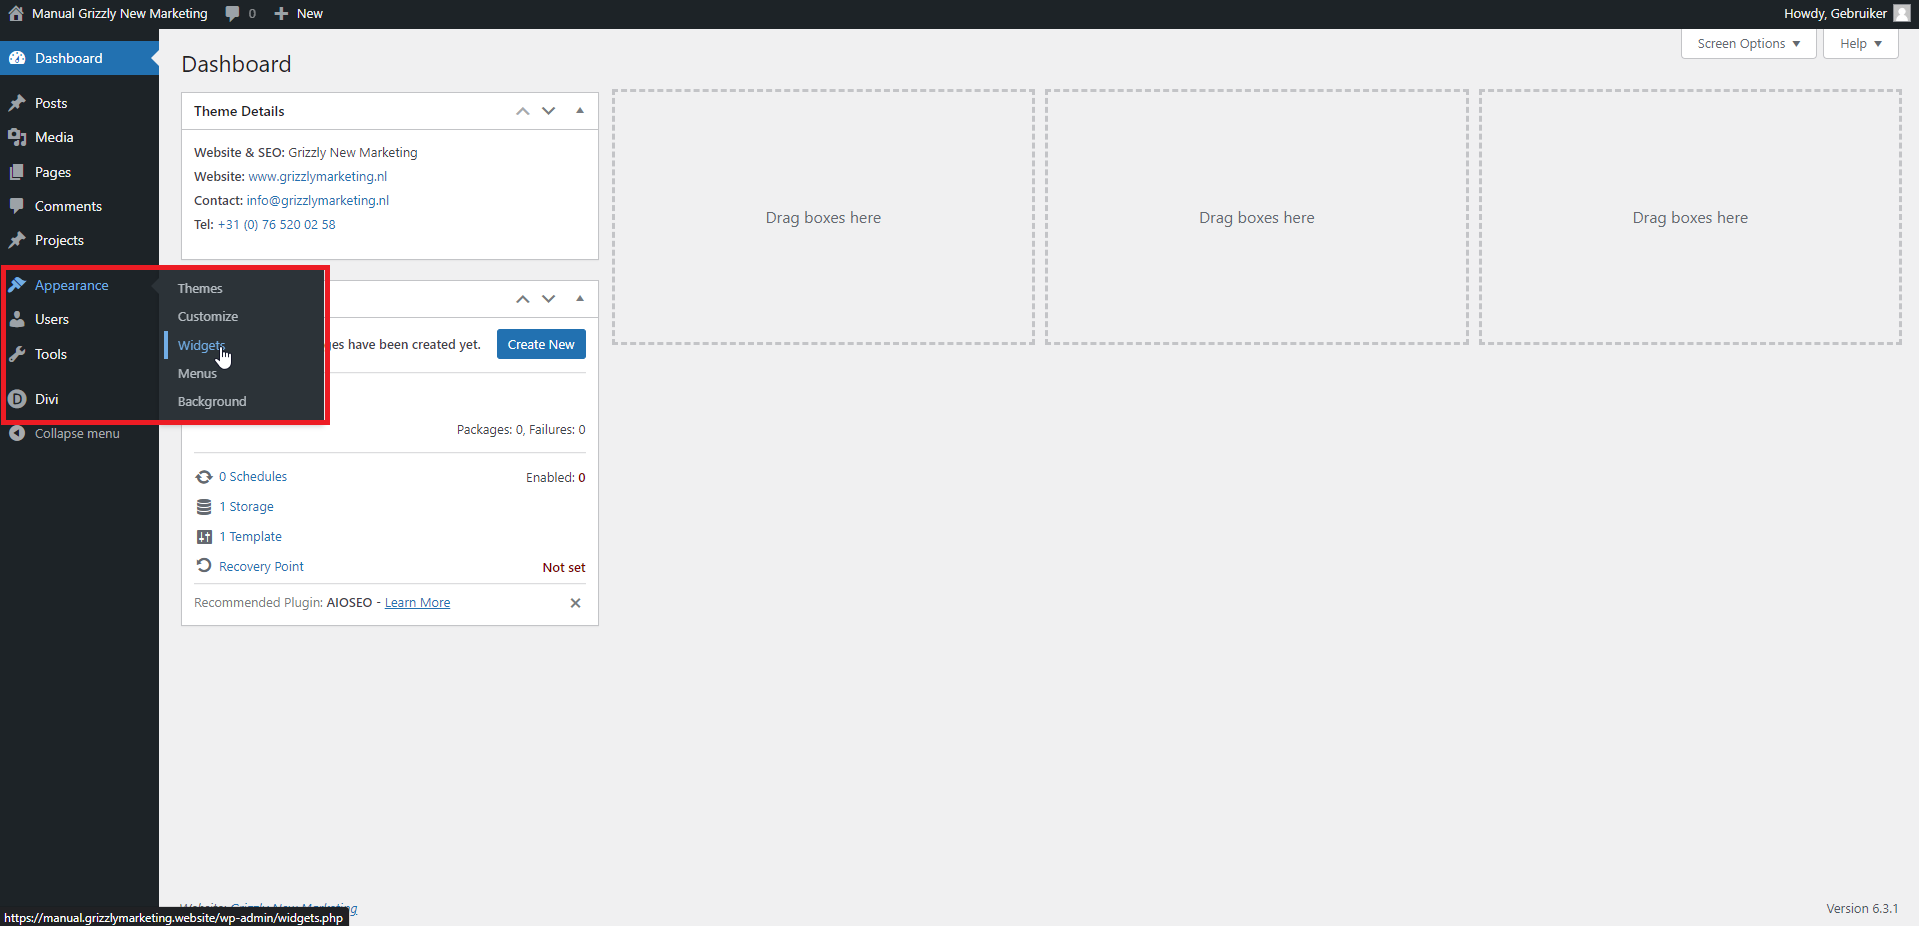
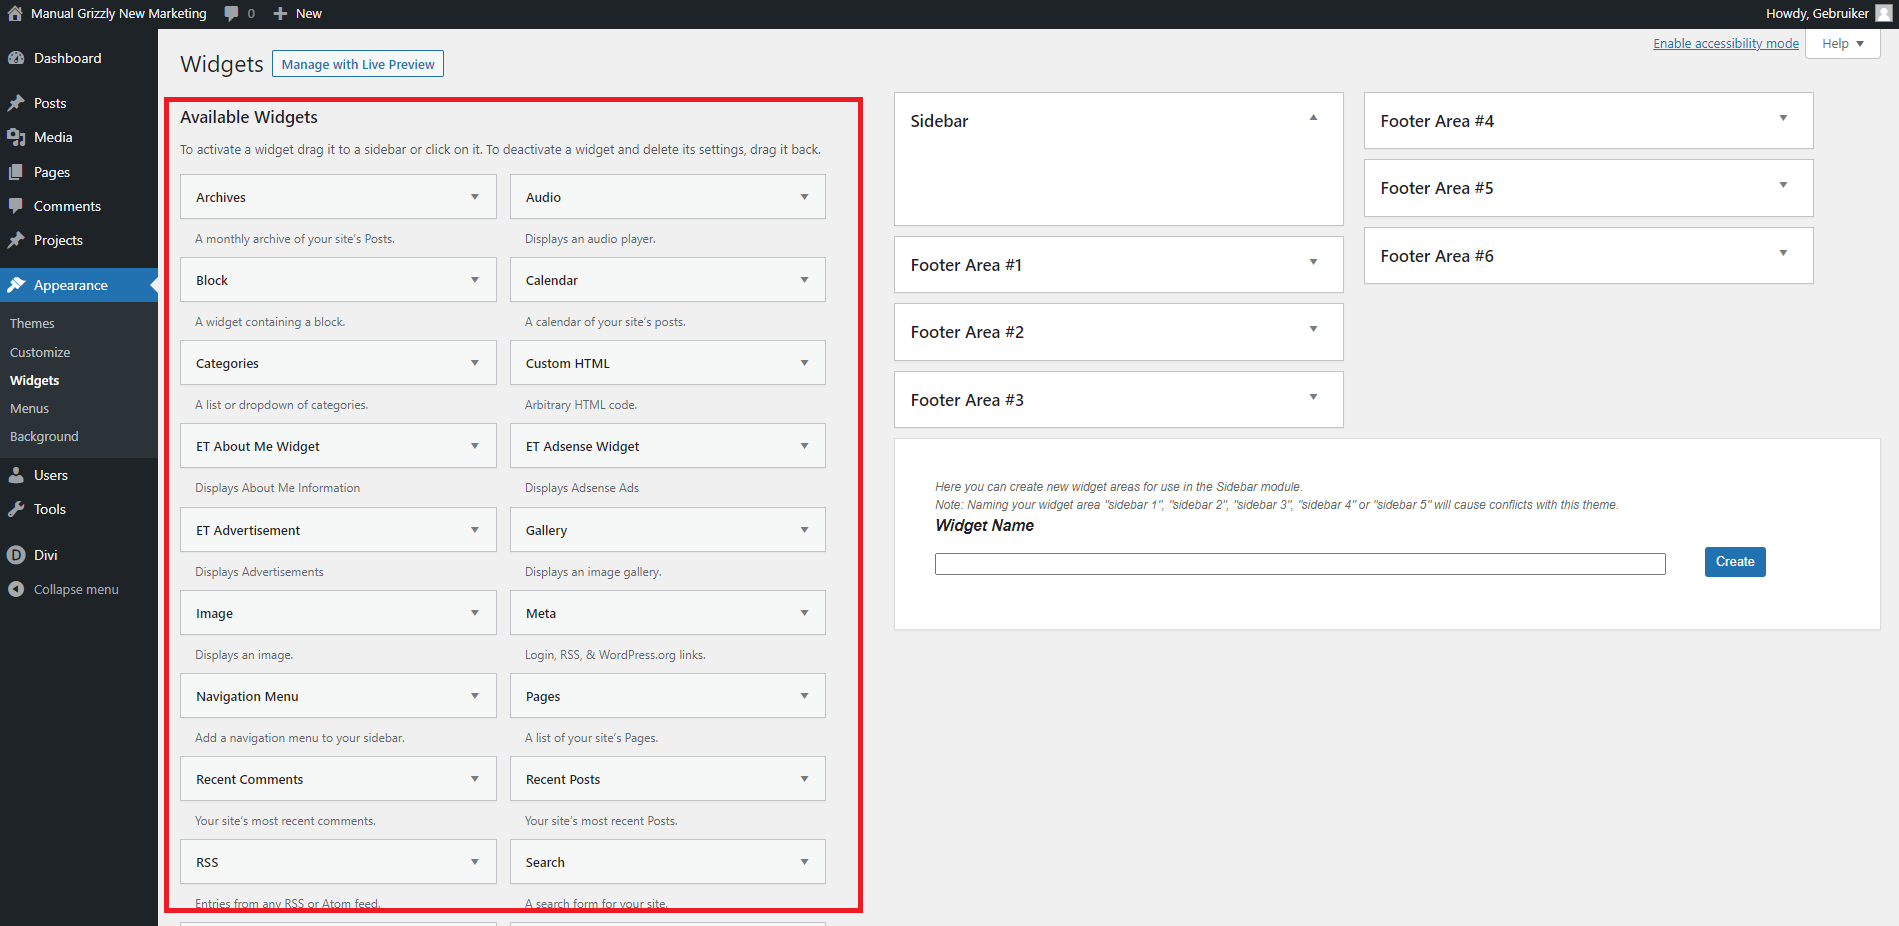
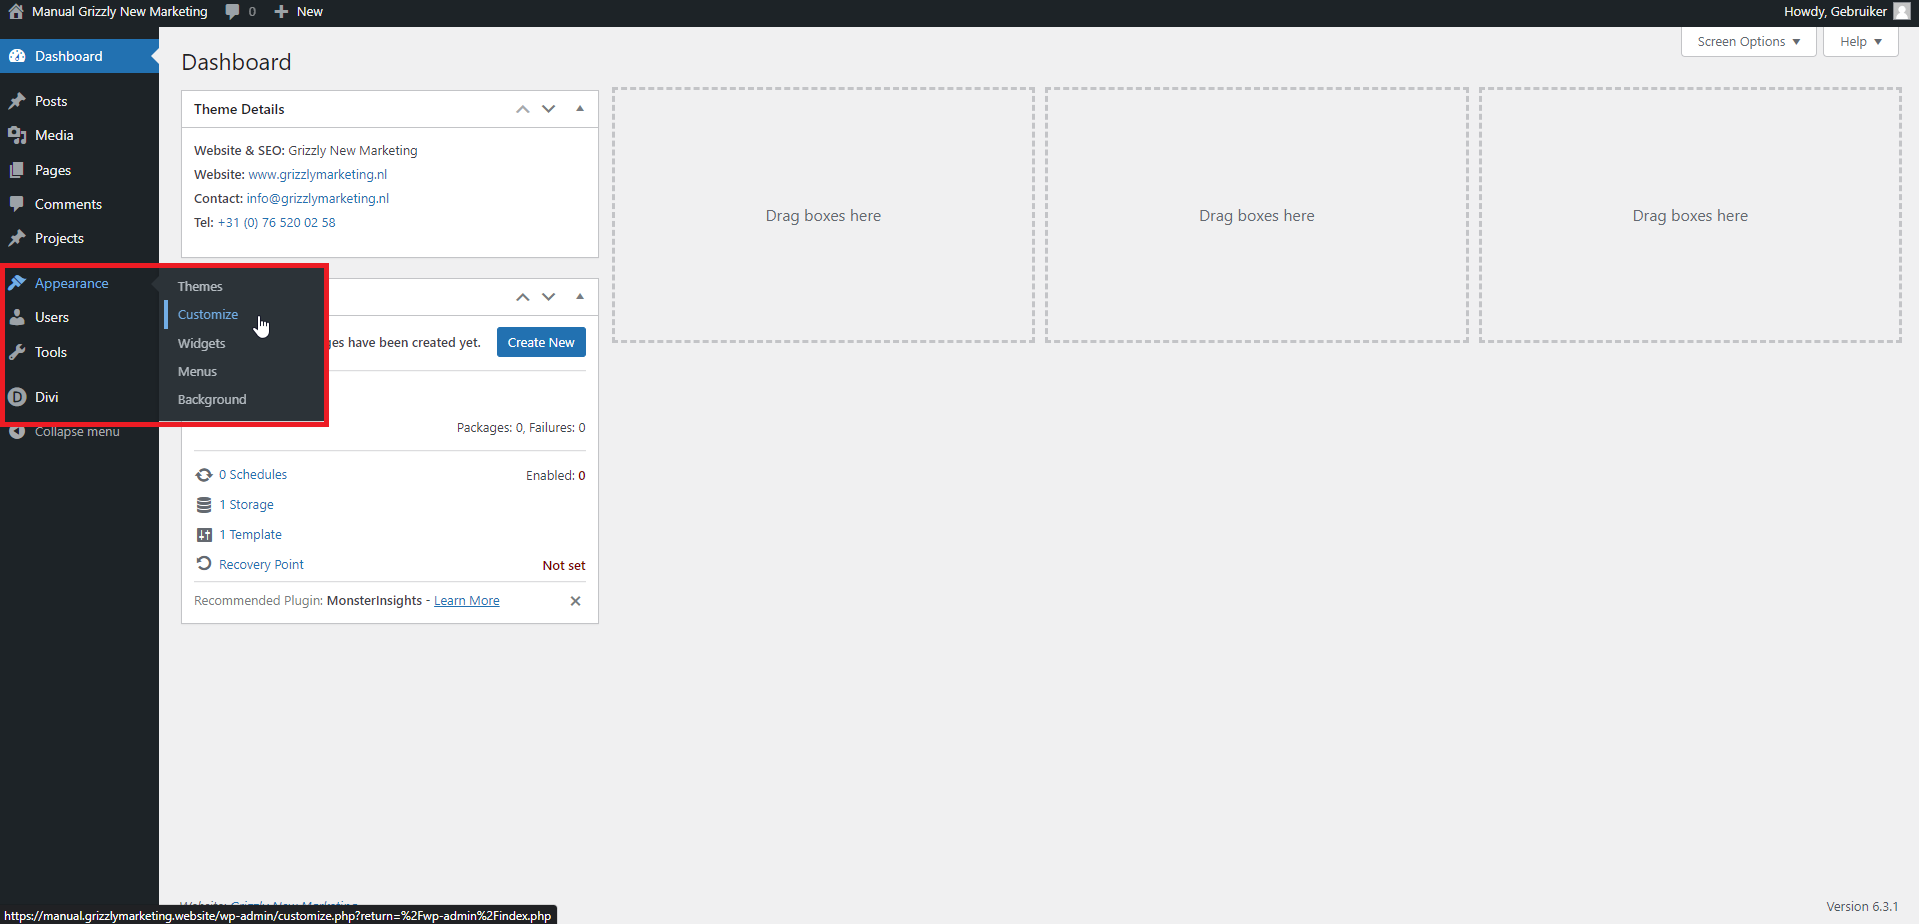
You can modify existing information in your footer within WordPress. To adjust the footer, first navigate in the WordPress menu to ‘Widgets’. You can get here by hovering over the ‘Appearance’ heading with your mouse and then clicking on ‘Widgets’ in the dropdown menu1. Then, you’ll see an overview of all widgets and an overview of your footer sections.
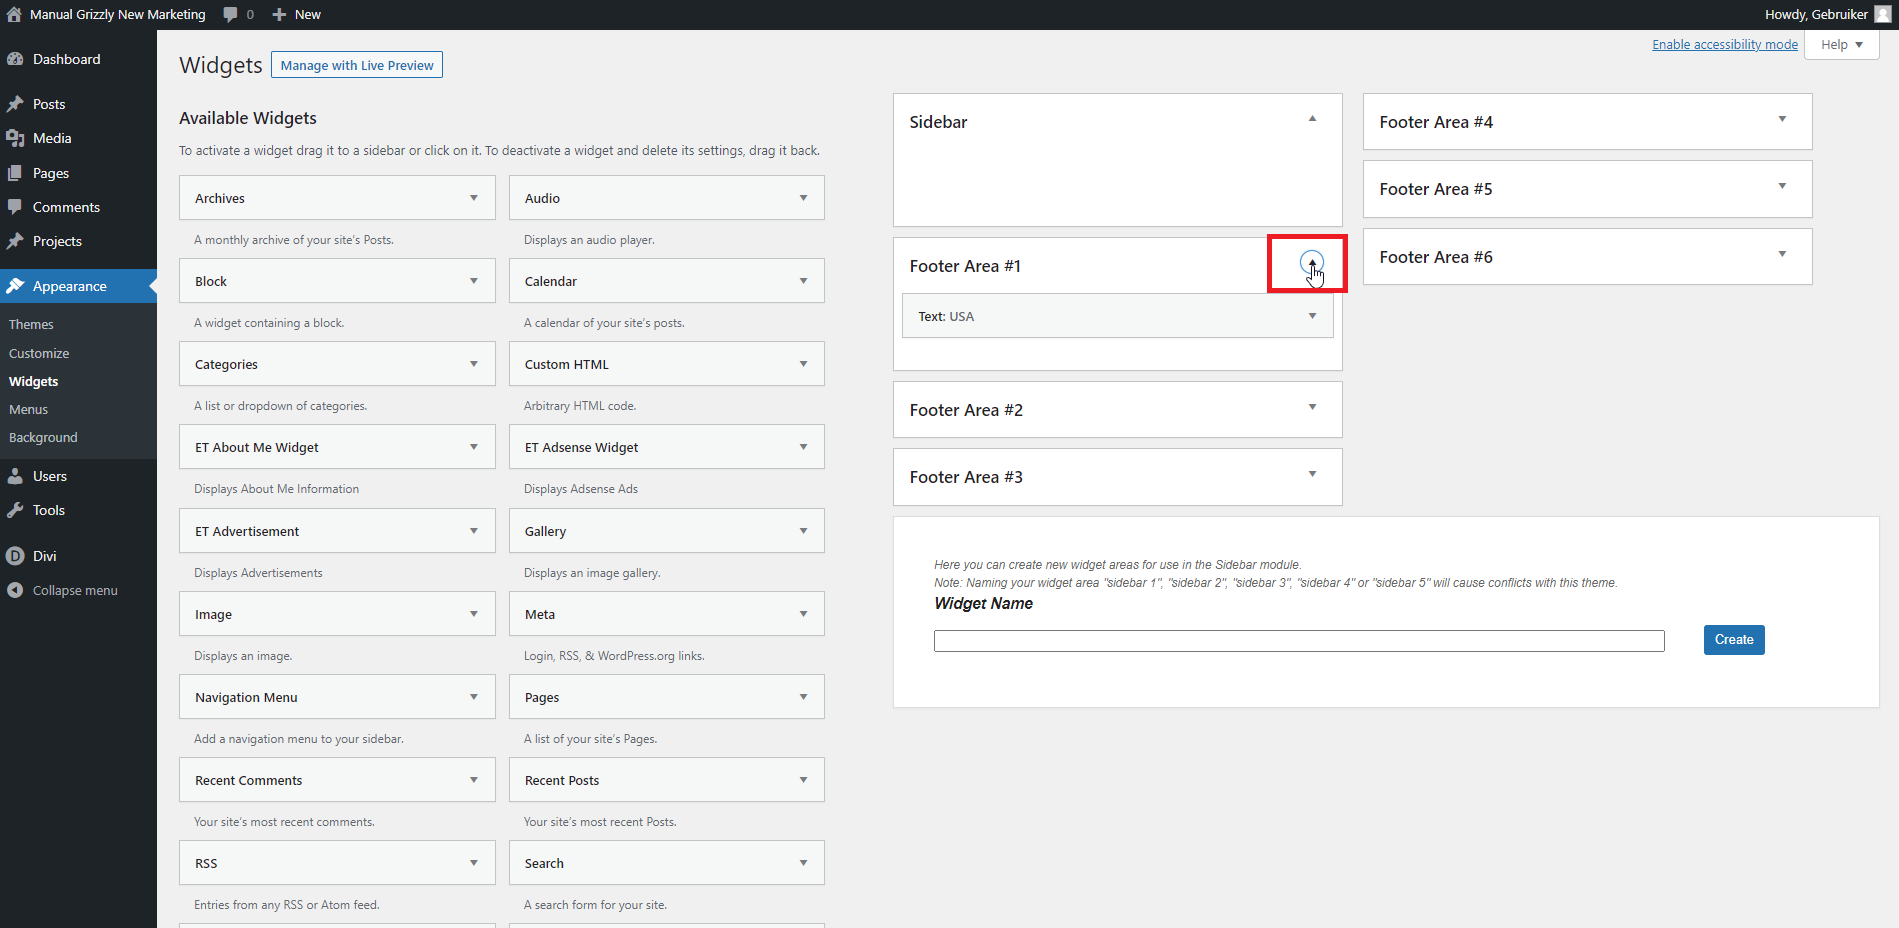
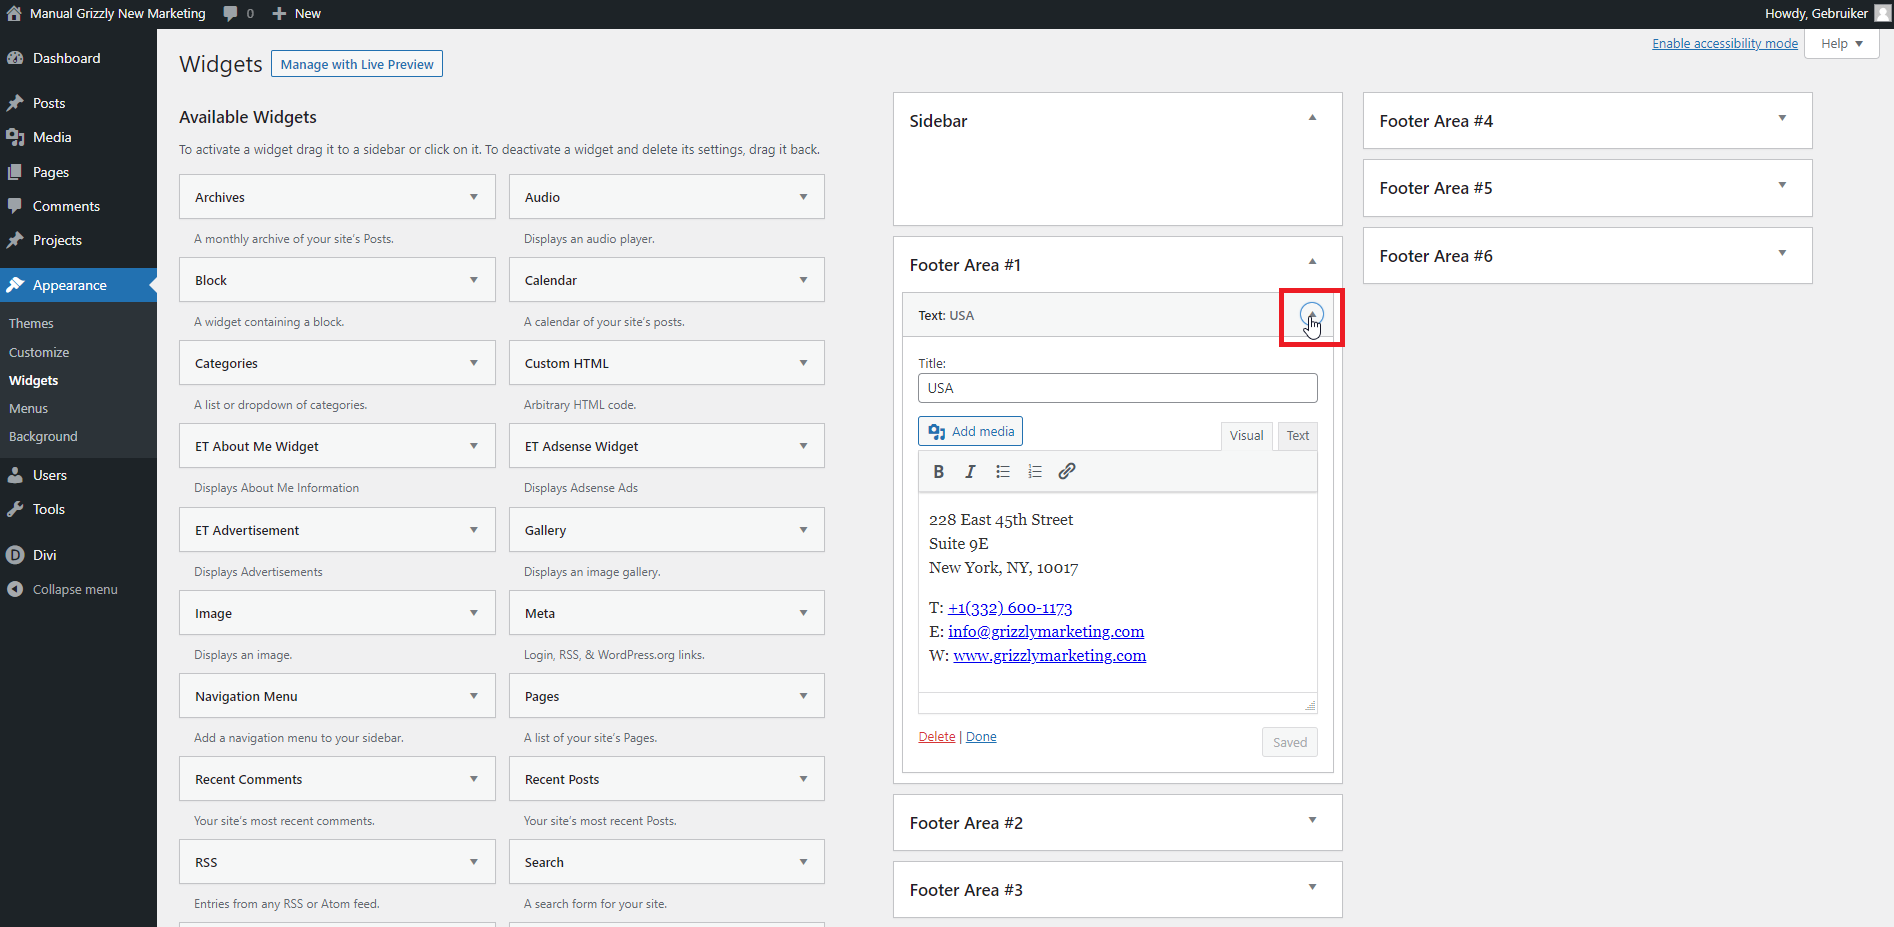
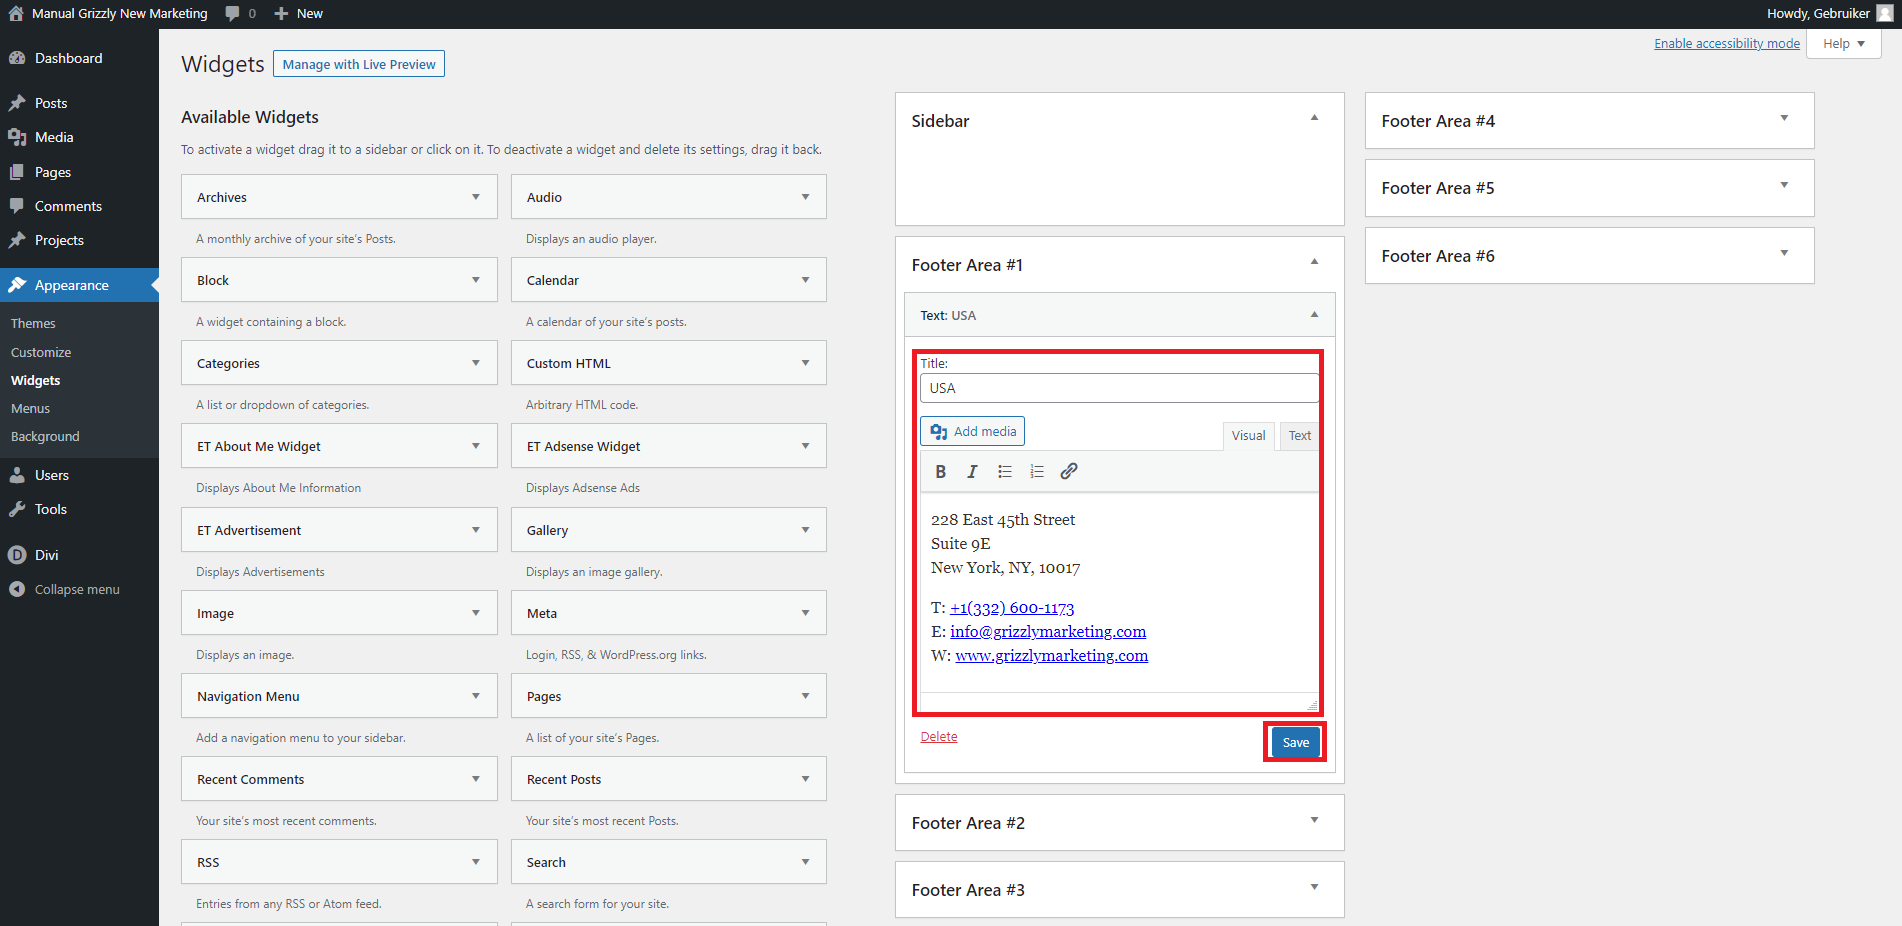
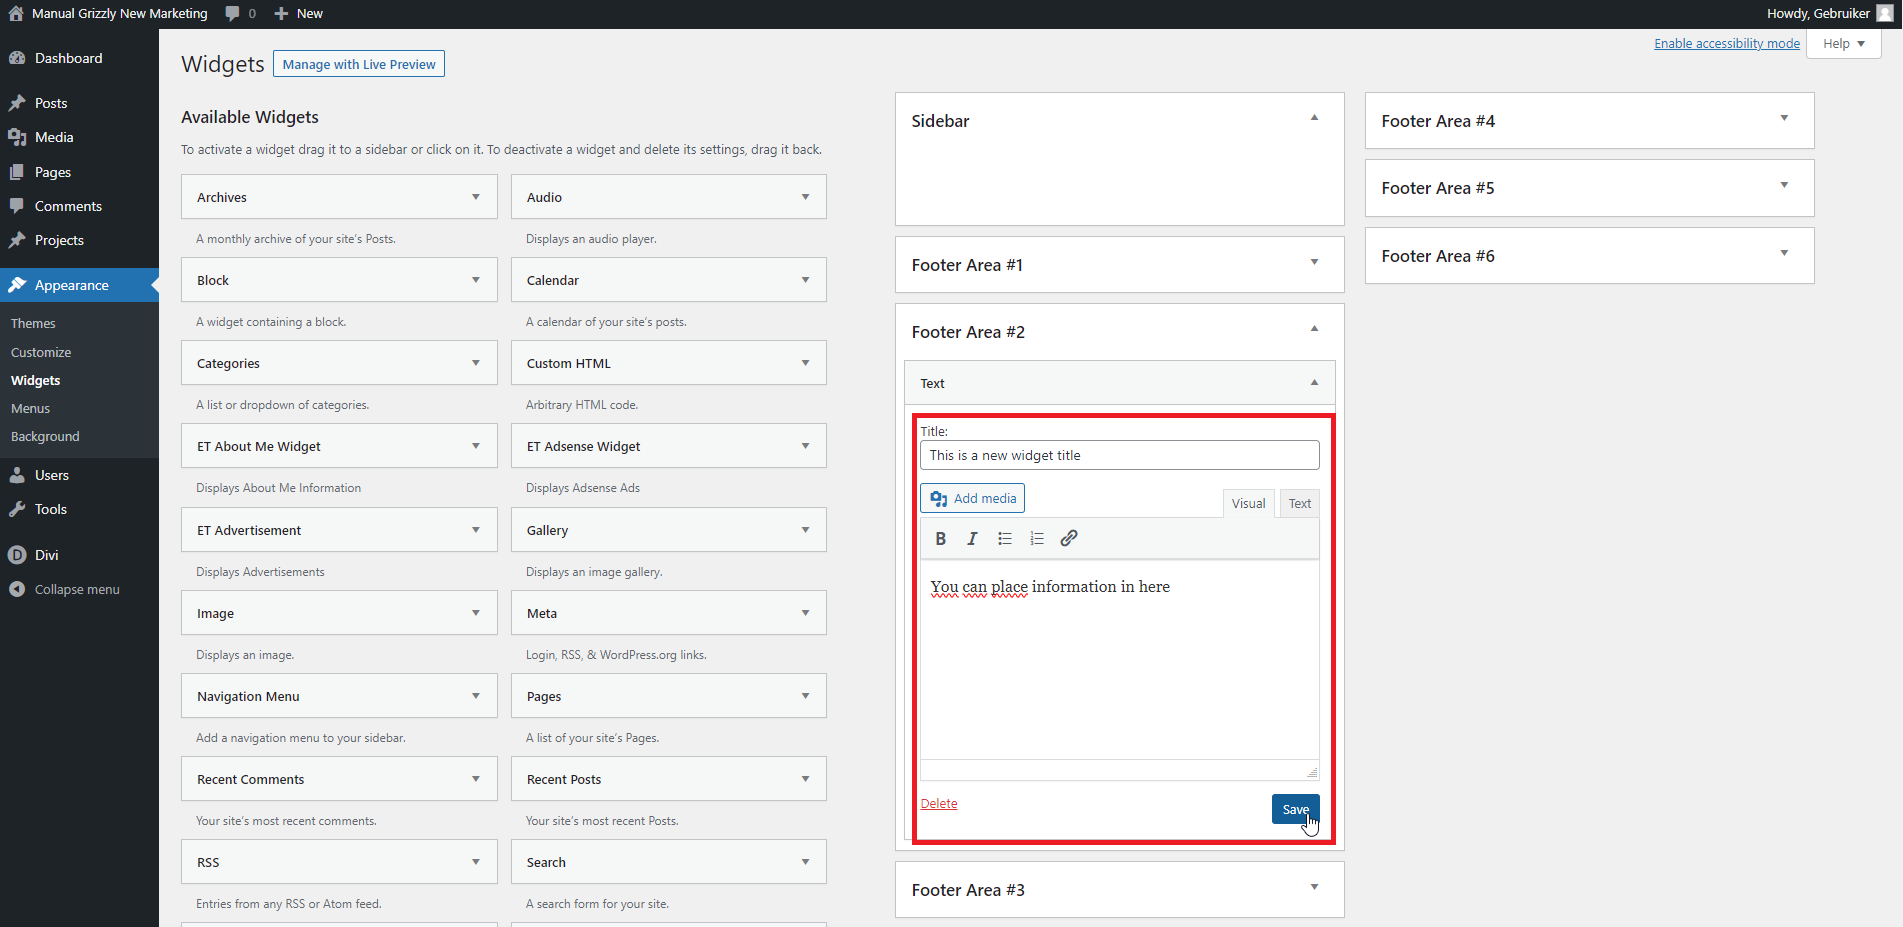
On the right side of this page, you can open the relevant footer section containing the information you want to change by clicking on it2. You’ll then see a widget which you can also open by clicking on it3. You can then adjust all information as desired. It’s crucial to save this widget afterward using the blue ‘Save’ button4. Once you save this, the modifications are immediately updated on your website.
Add New Footer Widget
You can adjust existing information in your footer within WordPress. To modify the footer, you must first go to ‘Widgets’ in the WordPress menu. Access this by hovering over the ‘Appearance’ tab and clicking ‘Widgets’ in the dropdown menu1. Then you’ll see an overview of all widgets and your footer sections2.
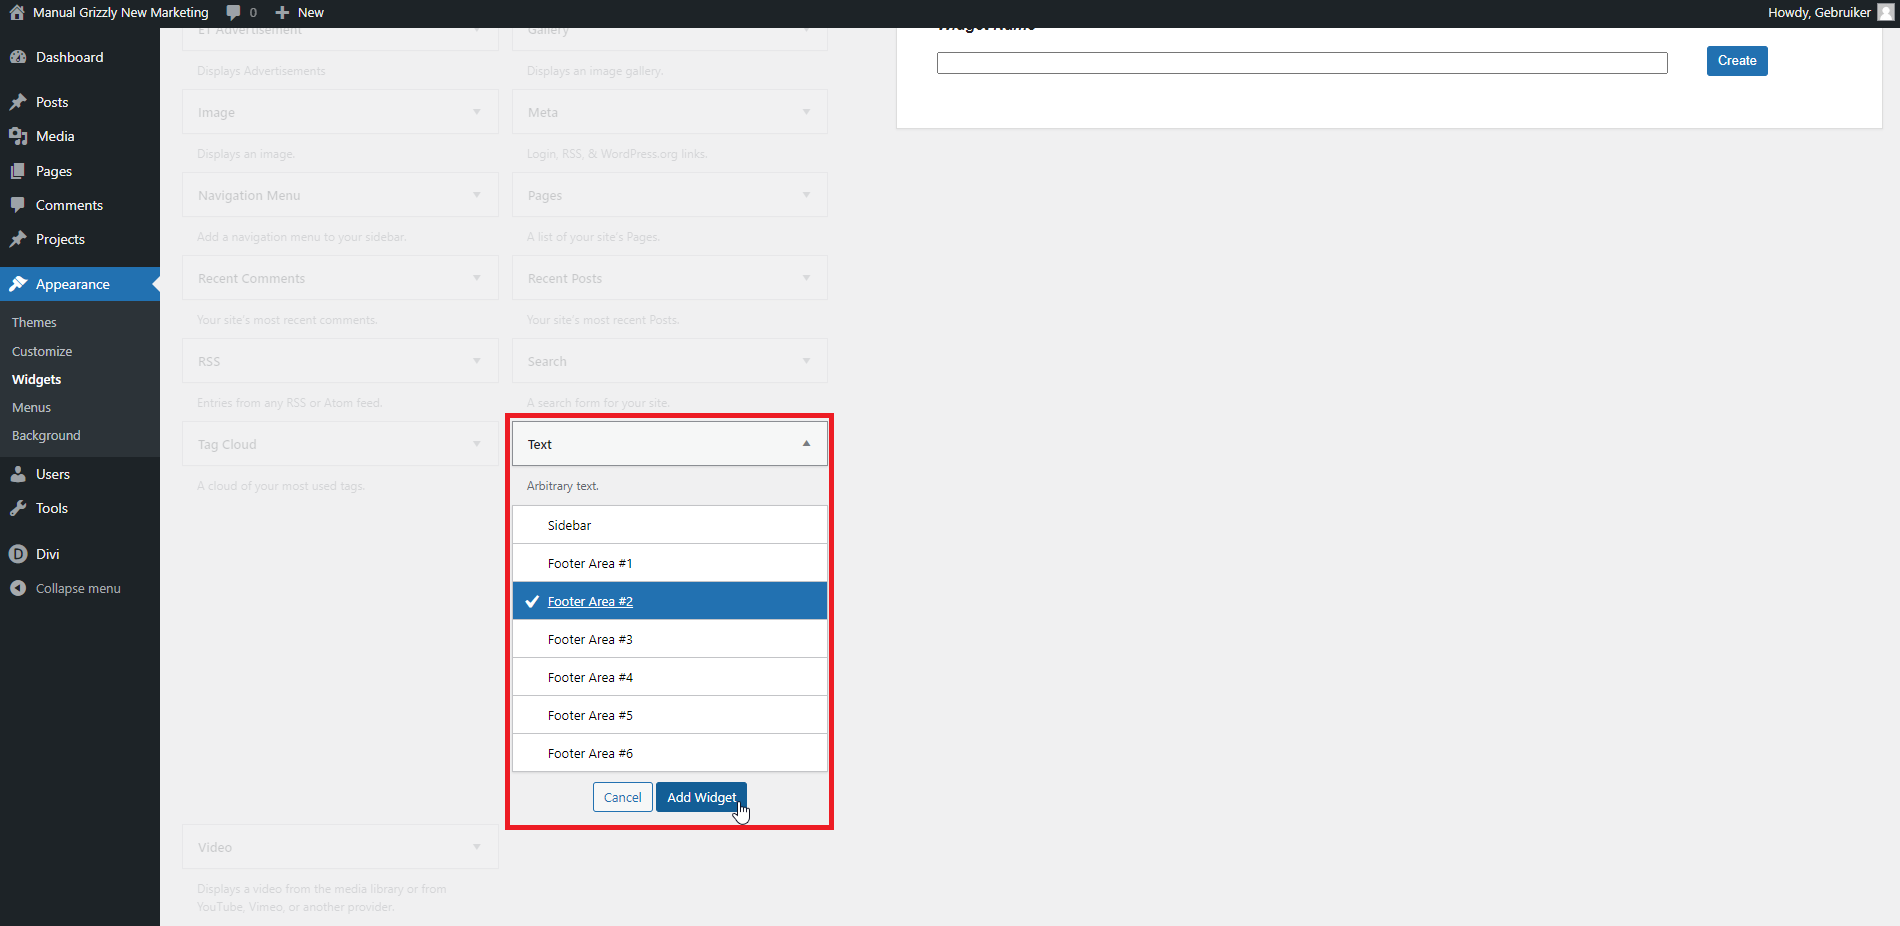
To add a new widget, click on the widget you want to add, located on the left side of your screen. You’ll then have the option to add this to a footer section. If your footer currently has 3 sections, for example, you can add the new widget to footer section 1, 2, or 3. Choose which section this widget should be linked to, then click on ‘Add Widget’3.
The widget will now open in the indicated footer section. You can then input the title and content as desired. When satisfied, you can publish the widget by pressing the blue ‘Save’ button. The widget will then be automatically saved and published4.
Determine the Number of Footer Sections
Perhaps you want to increase or decrease the number of footer sections. You can customize the structure of your footer as desired by navigating in the left-hand WordPress menu to ‘Appearance, Customizer’1.
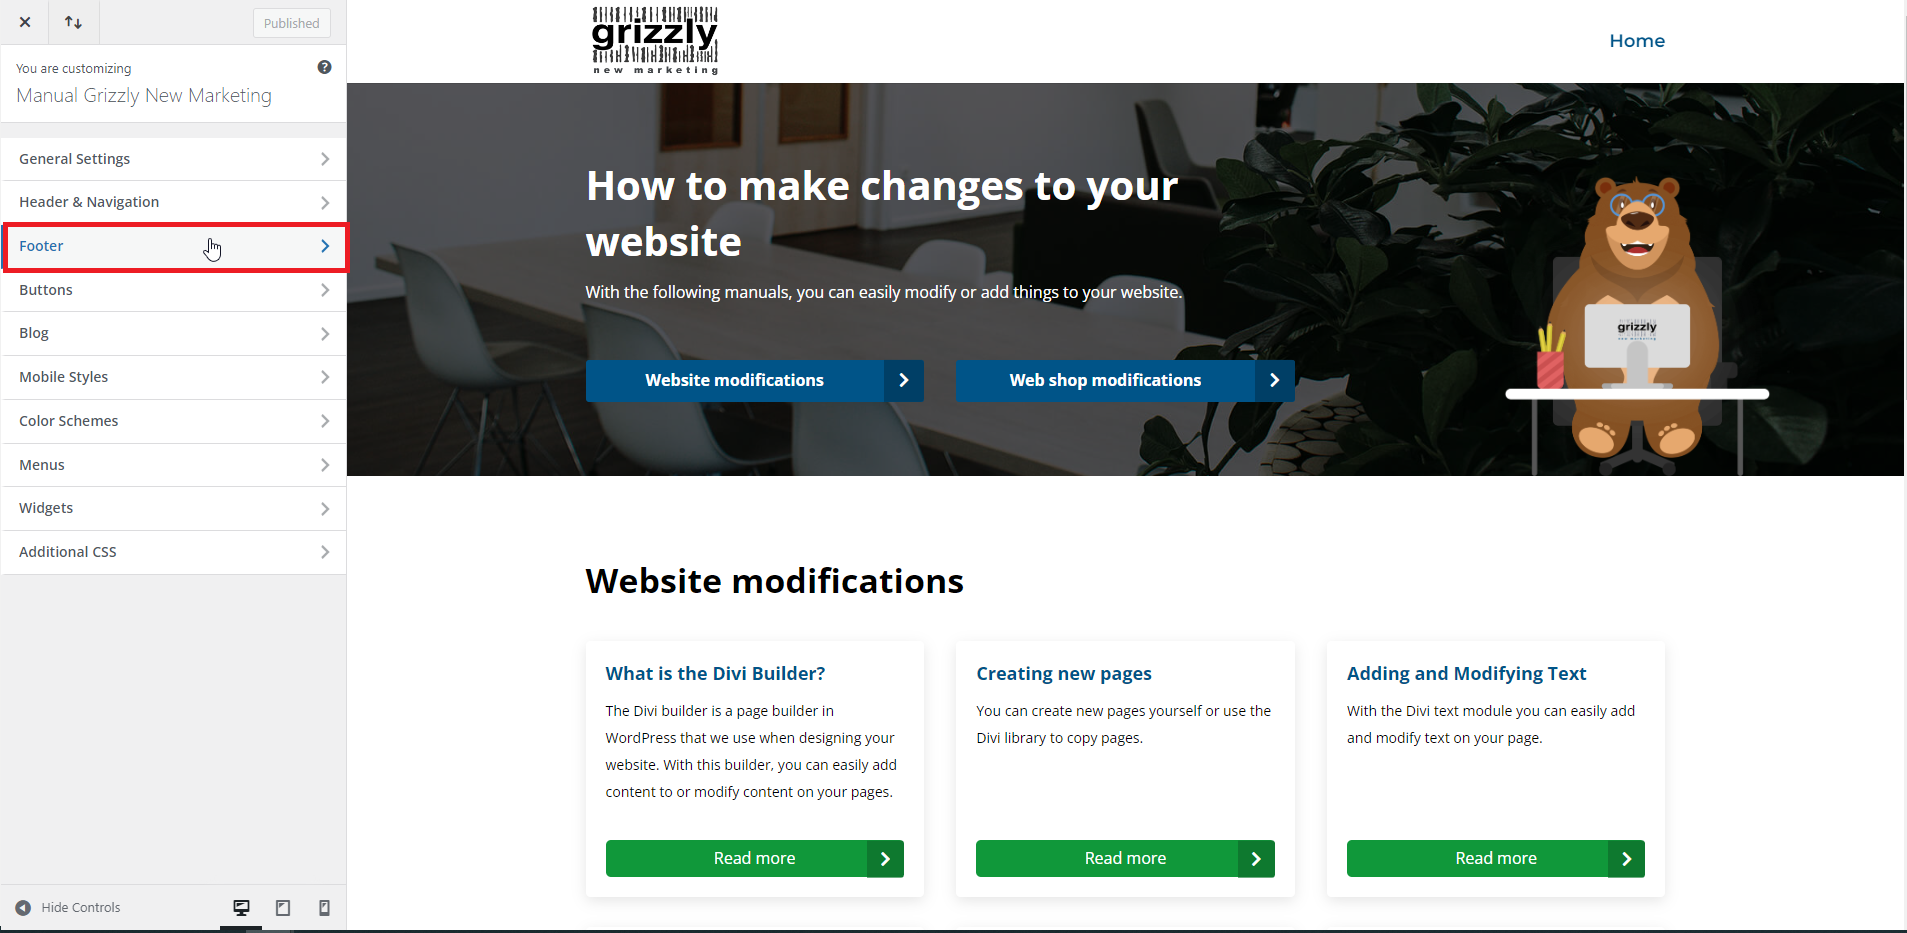
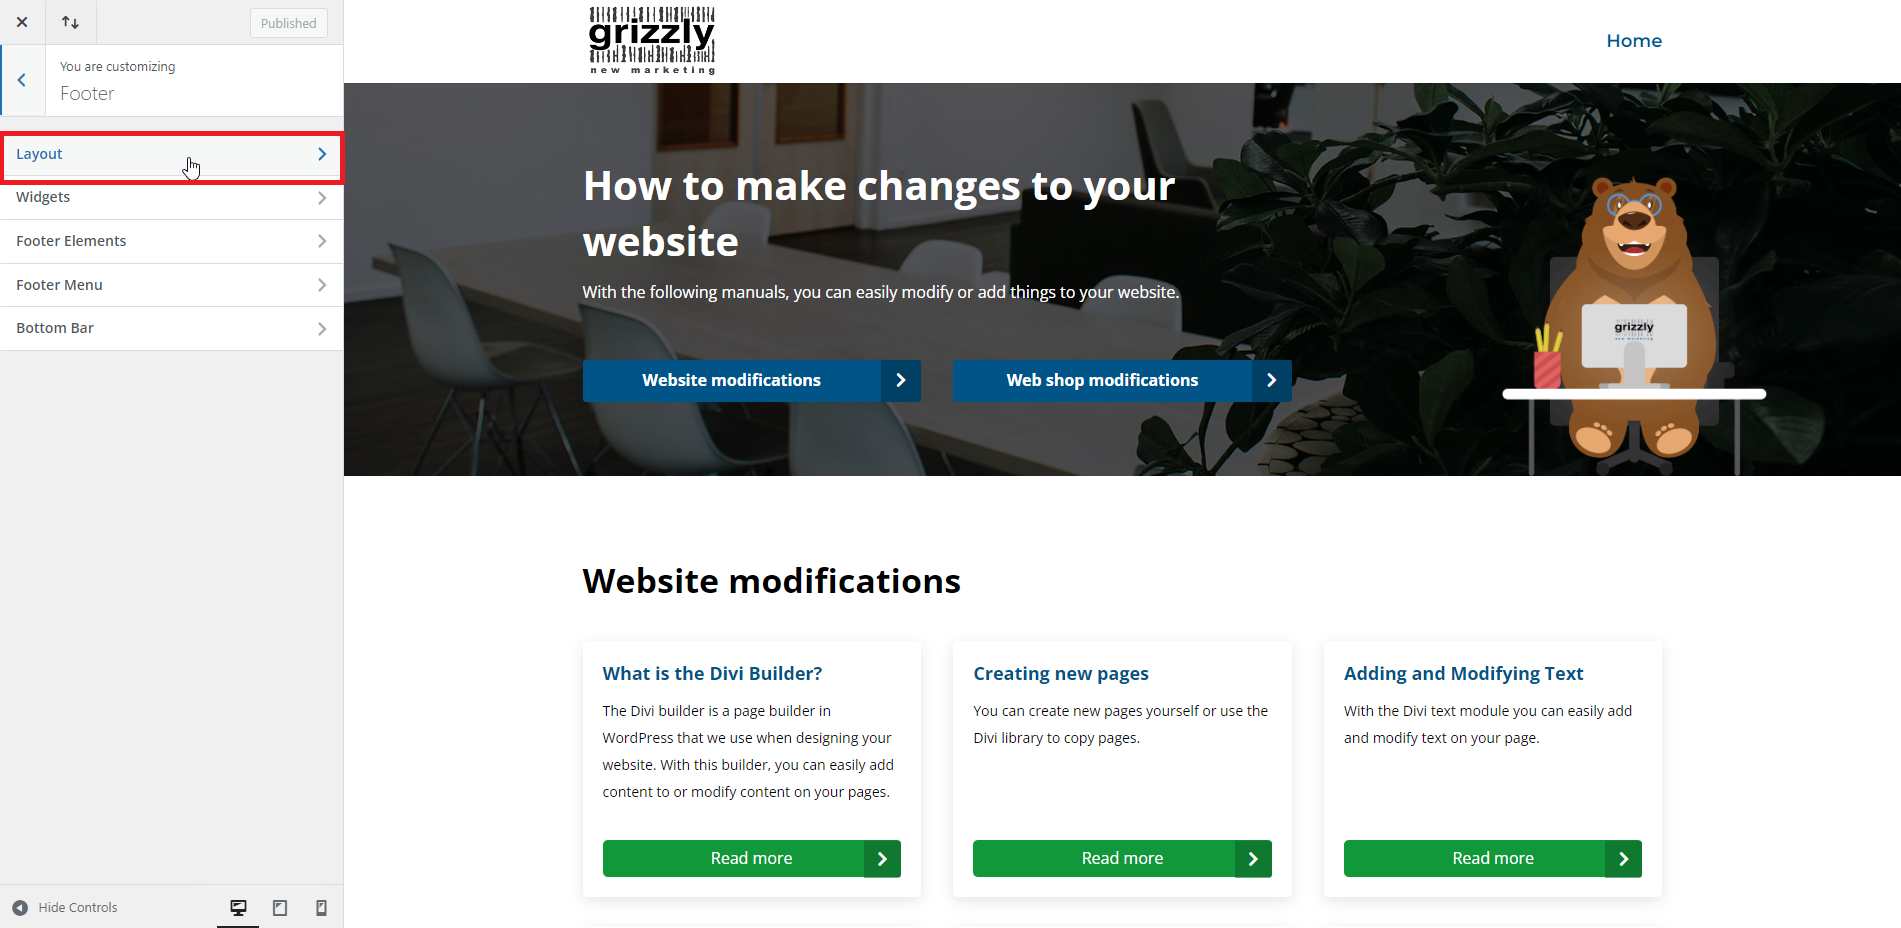
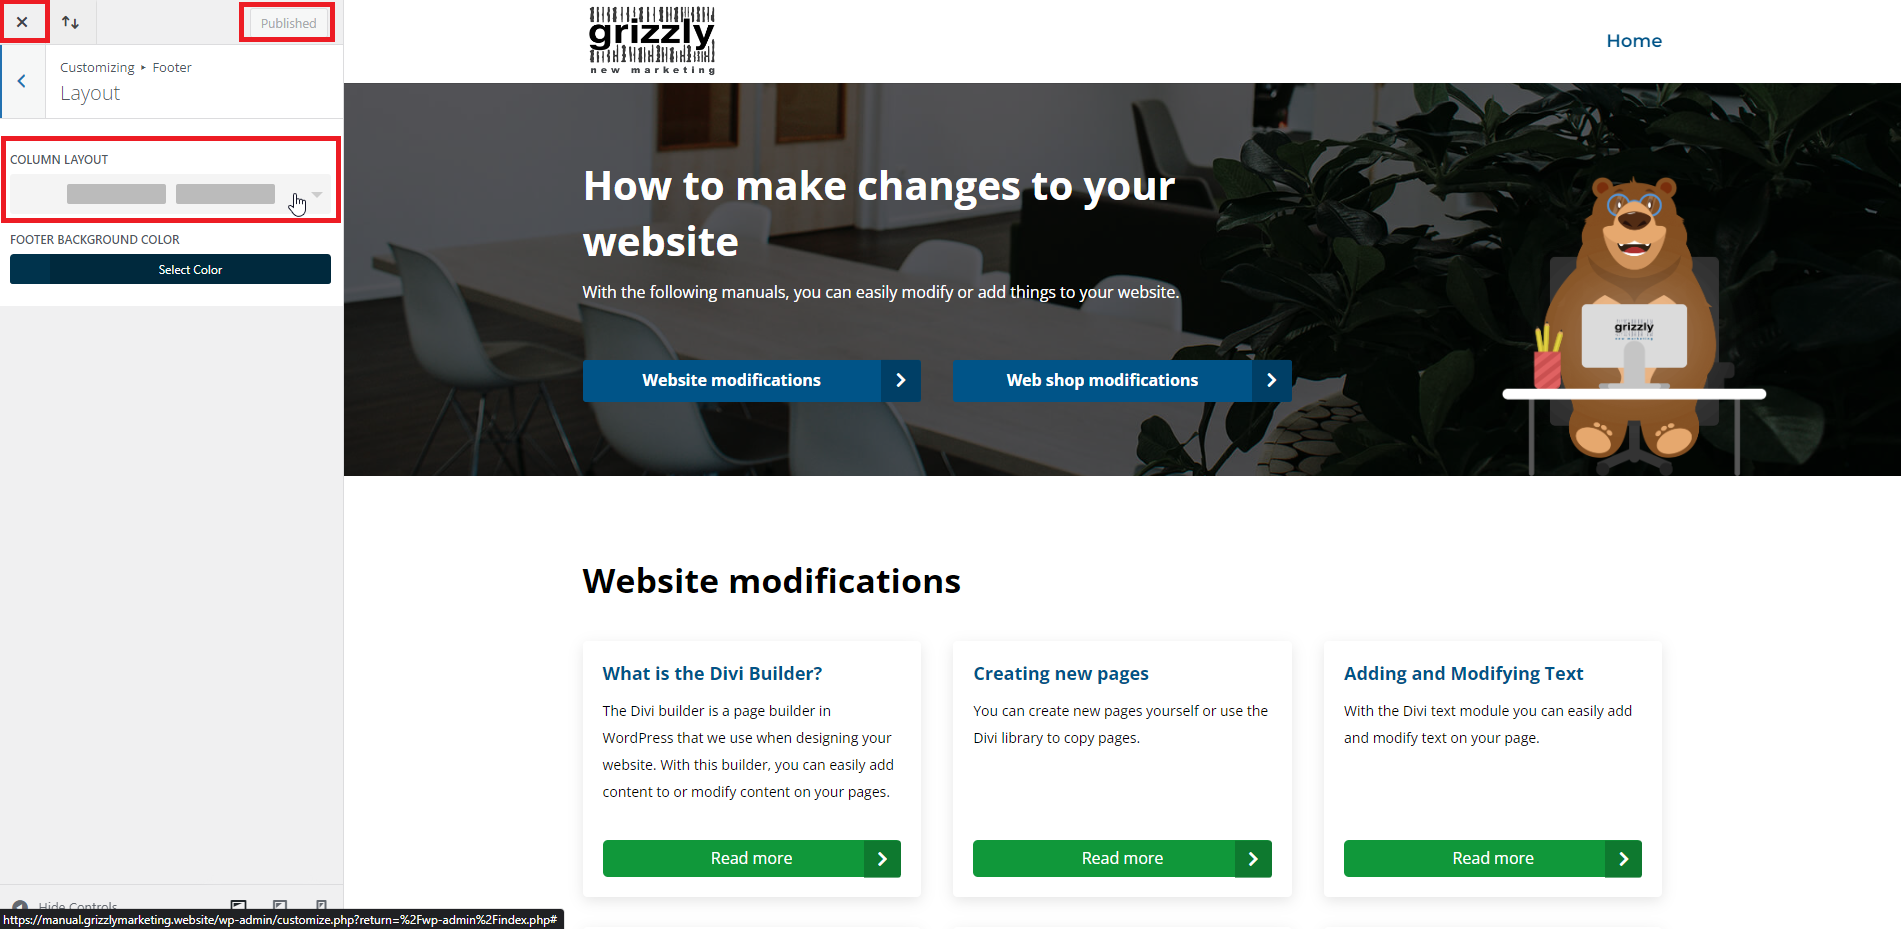
Once in the customizer, click ‘Footer’ in the left menu2. Then, you’ll be presented with several new options. Choose ‘Layout’ from this list3. In this option, you’ll now see a column layout heading with a dropdown list. Clicking on this list will display an overview of all footer section layout options4. Now, choose the layout you prefer. Implement your choice by clicking the blue ‘Publish’ button at the top left of the page4. This change is now saved and published. You can return to your WordPress environment by clicking the cross at the top left of the page4.


